Announcement

Collapse
No announcement yet.

Xkill Super build

Collapse
X
Collapse
Currently Active Users Viewing This Thread: 0 (0 members and 0 guests)
 
  • Filter
  • Time
  • Show
Clear All
new posts

  • Xkill Super build

    A Super has been on my plans for a long time.
    From the Classic 4 classes is the only one I miss.

    I had one but didn't last a long time at home but for sure I liked the style!

    I already designed the chassis and wheels.
    They will be made out of 4mm G10, should be good enough....

    It will have Super bully axles (yet to arrive from customs).
    HH 35t or Brood 45t
    Dual FXR or HH BRmini
    Probably Dual Futaba A700 on straight 3S.
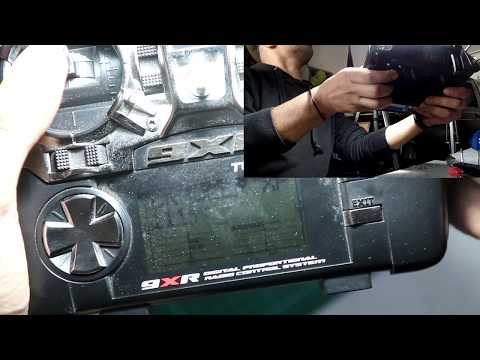
    Stick radio already prepared with an extra gimbal.

    That is the plan so far...
    Last edited by Xkill; 10-21-2020, 05:08 PM.

  • #2
    This'll be very interesting to follow!

    Comment


    • #3
      I think it will also be interesting for me!
      I will try to document and post as much as possible.

      I have the Radio ready for a year now!

      The Turnigy 9XR is ready for rear steer!!

      Last edited by Xkill; 10-27-2020, 10:45 AM.

      Comment


      • #4
        Looking forward for this!

        Comment


        • #5
          very excited about the build!

          Comment


          • #6
            Planing continues even if I have more projects on my table, literally...
            First is getting my CNC running, and this is coming along just fine!


            I already have the materials to cut the wheels and chassis out of 4mm G10, so having the CNC is crucial for this project.

            Then this arrived!!
            Click image for larger version  Name:	ResizerImage850X5665.jpg Views:	0 Size:	72.6 KB ID:	567

            Looks like I got some very special piece of kit here!
            Don't know how many were made.
            They have Dlux delrin tubes and Dlux machined knuckles on AX10 Chubs.
            Machined gears and cases.
            They need a cleanup and should be ready to go. I'm not sure if I'll change something now.

            Click image for larger version  Name:	ResizerImage4000X26662.jpg Views:	0 Size:	63.5 KB ID:	568

            Click image for larger version  Name:	ResizerImage3000X20003.jpg Views:	0 Size:	62.9 KB ID:	569

            Click image for larger version  Name:	ResizerImage850X5662.jpg Views:	0 Size:	57.0 KB ID:	571

            Click image for larger version  Name:	ResizerImage850X5663.jpg Views:	0 Size:	61.4 KB ID:	572

            Electronics are ready to go:
            A700 servos

            Click image for larger version  Name:	ResizerImage850X5665.jpg Views:	0 Size:	49.2 KB ID:	573

            Motor options:
            (Unmatched) 33t Puller 400

            Click image for larger version  Name:	ResizerImage850X5666.jpg Views:	0 Size:	56.8 KB ID:	574

            Fresh rebuilt HH TorqueMaster 35T (probably these will be used)

            Click image for larger version  Name:	ResizerImage850X5667.jpg Views:	0 Size:	74.5 KB ID:	575
            Click image for larger version  Name:	ResizerImage850X5668.jpg Views:	0 Size:	67.2 KB ID:	576

            Brood Specter 45T

            Click image for larger version  Name:	ResizerImage850X5669.jpg Views:	0 Size:	68.6 KB ID:	577

            ESC:

            FXR that would be smashed or HH BRMini

            Click image for larger version  Name:	ResizerImage850X56611.jpg Views:	0 Size:	67.0 KB ID:	578

            I'll continue with it as I can.
            This COVID **** doesn't help....
            Attached Files
            Last edited by Xkill; 11-06-2020, 11:00 AM.

            Comment


            • crawlercon
              crawlercon commented
              Editing a comment
              Were the gears machined to make the lighter? Or they are custom gears? ??

            • Xkill
              Xkill commented
              Editing a comment
              They are the stock gears machined from what I can see.
              It would be very hard and expensive to make full custom gears...
              But I still have to open the gearboxes.

          • #7
            Originally posted by Xkill View Post
            Planing continues even if I have more projects on my table, literally...
            First is getting my CNC running, and this is coming along just fine!


            I already have the materials to cut the wheels and chassis out of 4mm G10, so having the CNC is crucial for this project.
            Wow, wanting a CNC so bad too

            Comment


            • #8
              Can you belive this CNC was going to the junkyard?
              A friend of mine was working for a company and they were going to trow it away because it was not working properly.
              I got it for free and put another controller on it running Mach3.
              Now it's running properly, I just need to start experimenting with it as I have very limited experience....

              Comment


              • #9
                Whoever machined my bully axles did a great job!
                The gears looks awesome!

                Click image for larger version

Name:	Photo Resizer 2020_11_11_02_44_19.jpg
Views:	359
Size:	42.5 KB
ID:	594

                Click image for larger version

Name:	Photo Resizer 2020_11_11_02_45_03.jpg
Views:	348
Size:	50.7 KB
ID:	593

                Need to clean everything and put it together before I start loosing parts in the Empire of Dirt (Aka my desk).

                Comment


                • #10
                  The weight before I took them apart.


                  Click image for larger version

Name:	IMG_20201105_230208.jpg
Views:	341
Size:	181.8 KB
ID:	599Click image for larger version

Name:	IMG_20201105_230220.jpg
Views:	331
Size:	188.9 KB
ID:	600
                  I could still cut a little bit more but it would probably be less than 10g per axle and I'd stay with some gears exposed.
                  Meaning I'd have to build a plastic cover....
                  Sóõ I dont think I'm gona bother with it.
                  Attached Files
                  Last edited by Xkill; 11-12-2020, 04:58 AM.

                  Comment


                  • #11
                    Got very Lucky!
                    Even if the axle was looking and spining without a problem one bearing had graneded itself.

                    Click image for larger version

Name:	IMG_20201113_135359.jpg
Views:	556
Size:	78.0 KB
ID:	602 ​​​​​​The bearing balls were not found, probably in the midle of all the grease that I took out.

                    Then I had the problem of removing the old bearings.
                    Only with the heat gun I managed to take them out.

                    Click image for larger version

Name:	IMG_20201113_135125.jpg
Views:	551
Size:	85.0 KB
ID:	603 Only one gear has some marks but they will survive.
                    After all, its a bully v1!

                    Comment


                    • #12
                      Work on the Super continues!

                      While rebuilding the front axle I noticed the original CVD was really worn out.
                      I could not even take it apart and it was binding a bit.
                      The long term plan was to move to Universals at some point so that plan went to Fast Track.
                      It would have been better if I had a lathe but so is life....
                      They didn't turn out too bad and griding and bad lighting is the best remedy for crappy welds.
                      I hope they will hold.


                      Click image for larger version

Name:	IMG_20201116_132429.jpg
Views:	312
Size:	107.0 KB
ID:	626

                      Click image for larger version

Name:	IMG_20201116_161801.jpg
Views:	303
Size:	82.6 KB
ID:	627

                      Click image for larger version

Name:	IMG_20201116_165430.jpg
Views:	305
Size:	140.3 KB
ID:	628

                      After that I had to "adjust" the hubs that I am going to use on this.

                      Click image for larger version

Name:	IMG_20201124_172307.jpg
Views:	309
Size:	98.2 KB
ID:	629

                      Then it was off to the CNC!

                      Click image for larger version

Name:	IMG_20201123_160359.jpg
Views:	301
Size:	111.5 KB
ID:	630

                      Wheels and chassis were cut.

                      Click image for larger version

Name:	Photo Resizer 2020_11_26_07_58_25.jpg
Views:	297
Size:	51.4 KB
ID:	631

                      Click image for larger version

Name:	Photo Resizer 2020_11_26_07_58_36.jpg
Views:	307
Size:	76.5 KB
ID:	632

                      Chassis turned out very well!
                      I'm happy with it.
                      I can move the lower piece for a more front or central bias.
                      For now I think I will start with a more conventional setup.

                      Click image for larger version

Name:	Photo Resizer 2020_11_26_07_55_06.jpg
Views:	337
Size:	39.7 KB
ID:	633

                      Click image for larger version

Name:	Photo Resizer 2020_11_26_07_57_55.jpg
Views:	295
Size:	35.2 KB
ID:	634

                      Click image for larger version

Name:	Photo Resizer 2020_11_26_07_58_12.jpg
Views:	300
Size:	42.1 KB
ID:	635

                      I made a upper brace for the chassis but the home printed ABS decided to shrink and doesn't fit...

                      Click image for larger version

Name:	Photo Resizer 2020_11_26_07_58_49.jpg
Views:	307
Size:	35.8 KB
ID:	637

                      This might not be the final color setup for the wheels and chassis but you get the idea...

                      Click image for larger version

Name:	Photo Resizer 2020_11_26_07_59_00.jpg
Views:	309
Size:	76.1 KB
ID:	636


                      I will be using a 3D printed, all in one, spacer and back ring.
                      This might not be the lightest (I can still work on that), but it's very simple and cheap.
                      Only 4 screws on are enough for a very stiff assembly.
                      Disadvantage is that the width can't be changed easily....

                      Click image for larger version

Name:	Photo Resizer 2020_11_26_07_59_11.jpg
Views:	315
Size:	42.3 KB
ID:	638

                      Shes gonna be a PIG!!!
                      150g per wheel without the insert and tire!!!

                      Click image for larger version

Name:	IMG_20201123_163121.jpg
Views:	295
Size:	102.2 KB
ID:	639

                      Updates will take some time now but I'm happy with where this project is now.


                      Attached Files

                      Comment


                      • #13
                        Very cool , good job

                        Comment


                        • #14
                          cool design !

                          "I made a upper brace for the chassis but the home printed ABS decided to shrink and doesn't fit..."

                          Yes I know, ABS shrink a little bit! Measure the component and for the next 3d-print enter the difference in the slicer, for example print 2% bigger.

                          Comment


                          • #15
                            Looking good. You planning on running servo strengtheners or do you think you can get aways without them? Can you post a couple photos of your Pro so we can see how your skidless design works?

                            Comment

                            Working...
                            X